Wednesday, April 25, 2012

Biomimetic Butterflies


Hi there! I know it's been a bit since my last post but life is getting, um, "full and busy" these days as things move forward. But I simply HAD to share these butterflies with you. These ravishing beauties were created in 2007 by The Barbarian Group, an interactive marketing firm, for the exhibit Interactivity at the McLeod Residence, a gallery in Seattle, Wa. The butterflies are laser cut from paper and are rigged up, through a system of motors, magnets, video cameras, and computer magic that I would be hard pressed to explain, to respond to observers by flapping their wings. The details of the installation and the creation of the wings can be found here, (it's pretty neat-o if you're a geek-nerd type so I'll see you there!) and you can check out the wing flapping happiness in the video below.


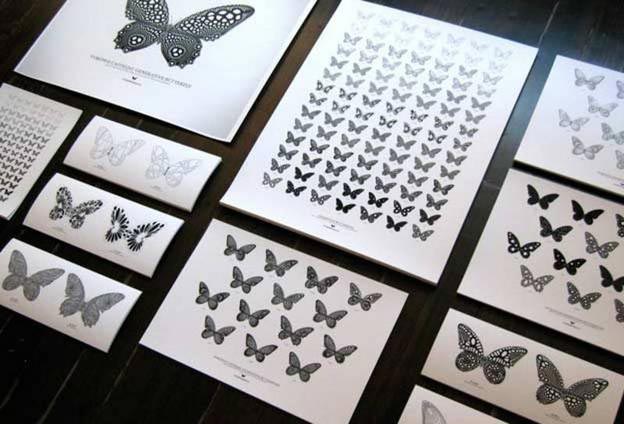
The Barbarians designed seven "species" of butterflies for the exhibit using unique algorithms for each. It gets a tad "math-y" but you owe it to yourself to check out the families by going here. For example:


butterfly
Circle Packing


butterfly
Voroni


butterfly
Cracking


                                                                                 Photo- Life As Art via Flickr


Here is a video of the process of creating these wings posted by Robert Hodgin, one of the barbarians, on Vimeo. He says he used magnetic forces and voroni to create the patterns. Voroni is a type of mathematical dividing of a space with a certain specified point in each division. Math-y stuff, I know. Cornell University has an applet that let's you play around with making Voroni diagrams and once you do it, by clicking anywhere, you can easily see how it divides the space so that there is only one specified coordinate in each division. Go ahead, watch the video below and then go play at Cornell's site here.


Source


Easy, right? Then stick it in the laser cutter. Nerdy stuff really is pretty cool.


Another of Robert Hodgin's images of biomimetric butterflies.


What exactly is biomimetics? It is defined by Websters as "the study and development of synthetic systems that mimic the formation, function, or structure of biologically produced substances and materials and biological mechanisms and processes.' So it is the study of structure and function of biological systems, such as butterfly wings, to use in the design of structure, function, and materials of machines or devices. We touched in this in the post about pearls where we learned that scienticst studying the structure and compostion of pearls are using what they've learnedabout pearl nacre in applications for dental implants, artificial bones, and computer components. Anyway- it's biomimicry.


As for butterflies, scientists are using the new discovery that butterfly wings have cells that are natural solar collectors to improve solar technology or hydrogen gas- a green fuel- production. Or how about applying information about the structure and function of the wings and their reflectivity to improve display screens for cell phones, e-readers, and tablets. Cool shtuff, eh?


Did I find other pretty butterfly things while working on this post? Oh you bet I did.


1310275217 30 Biomimetic Chandelier of 500 Photovoltaic Butterflies by Jeroen Verhoeven : TreeHugger
Photos: Bas Helbers, Giulietta Verdon-Roe

"We’ve seen chandeliers made from recycled bicycle parts and cultured crystal, but this imaginative take on fusing lighting and renewable energy generation must be the ultimate in solar-powered gadgets. Taking its biomimetic cue from real-life butterflies that use their wings to gather vital solar energy, this spectacular chandelier is made from 500 butterfly-shaped blue cesium photovoltaic cells, which in turn self-powers a large, hand-blown glass bulb in the center. Dubbed “Virtue of Blue,” it’s designed by Dutch artist-designer Jeroen Verhoeven and masterfully blends ecological design with art and functionalism." Source


This video shows the slow-mo flight of an artificial swallowtail built by Hiroto Tanaka and Isao Shimoyama from Harvard University and the University of Tokyo, respectively, to test their hypothesis about flight. You can go here to read up on it if you would like.  How's this model for a delicate little bit of their craftiness?


Finally, since this is a rather black and white post, I'll leave you with a bit of color. Not that these butterflies have anything to do with biomimicry, necessarily, but they are colorful and pretty and, you know, made from sugar.

 
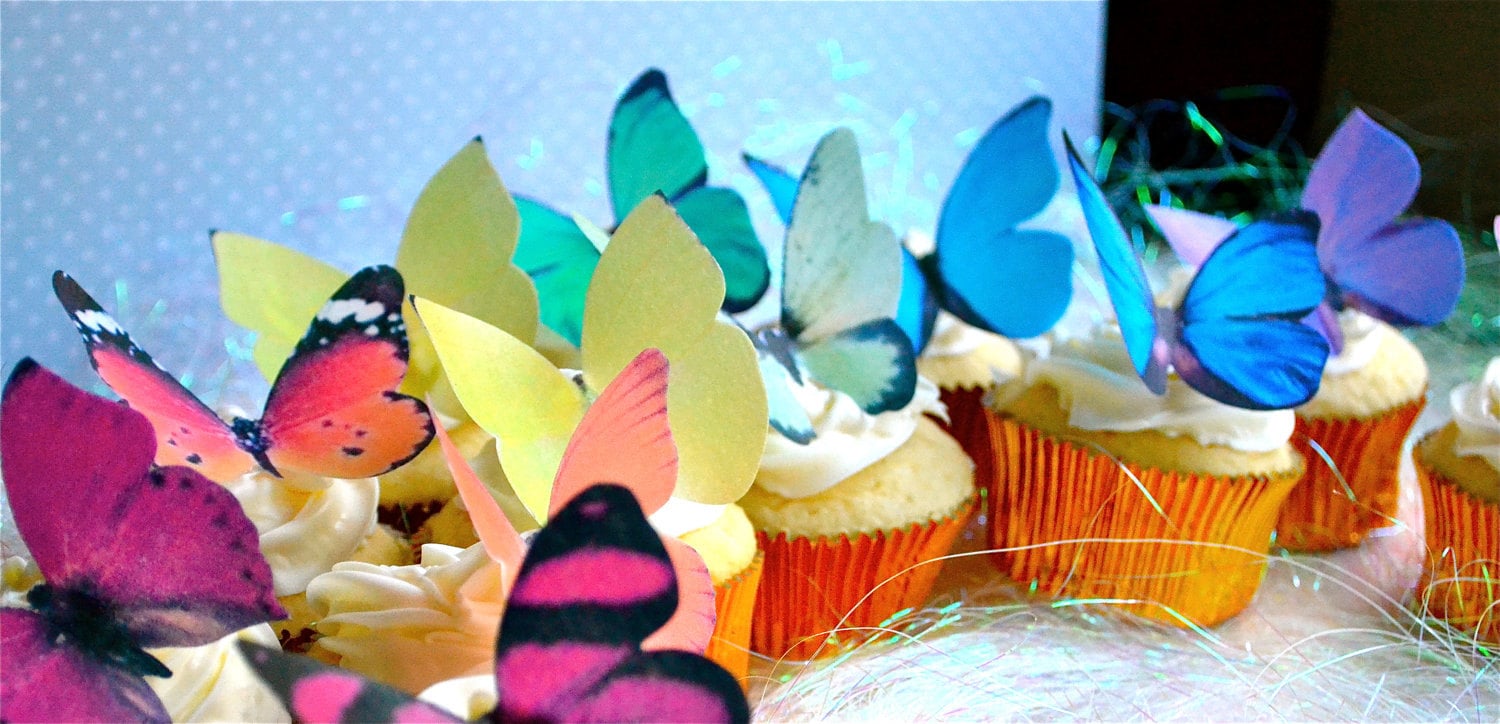
Image by SugarRobot via etsy.com
  

So I just found out that my niece, who is expecting in June, is decorating her nursery with a butterfly theme. OK, people, why am I just now finding that out? Anyway, after seeing the gorgeous laser-cut butterflies from The Barbarians, my exacto knife is itching and flittering a bit and I have a tiny egg of an idea for the newest addition to our family. Did I say egg?


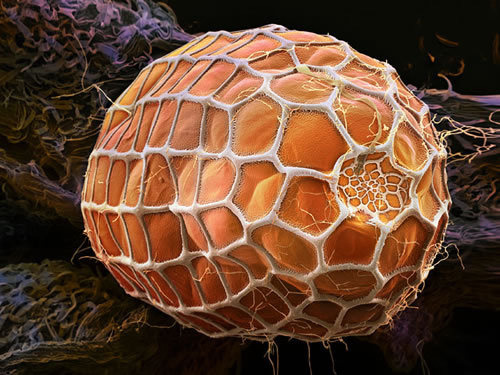
Egg of Zebra Longwing Butterfly. Image via National Geographic.

See ya next time!


Monday, April 9, 2012

Eating: Good Old Fashioned Chow


Salt-rising bread and tomato gravy. If you've ever had either one, that's about all that needs to be said. That and "Oh yum, where can I get some?" But for the uninitiated butterflies out there, let's explore this little bit of heaven from the kitchen.


Salt-rising bread doesn't get the usual high dome that most breads have.


Let's start with the bread. I was introduced to salt rising bread by my husband's family. Big 'Un's grandmother used to make this bread and there were plenty of wise cracks about salt rising bread. Mention it and they all rolled their eyes or backed away, saying things like "Oh my, not that." They told me that basically salt rising bread stinks. Like a baby diaper or old gym socks. Grandma apparently made salt rising bread very frequently and had people lined up outside her door wanting to buy it but, oddly, there was never any around my mother-in-law's home and I never had it until Grandma gave me a loaf- gave it to me, not my husband. But a funny thing happened when none of his siblings were around- my husband chowed down on MY loaf of bread. And yes, a distinctive odor floated up out of the toaster. Like the way, yes, the odor floats up out of a baby's diaper. When the starter for this bread is, um, starting is when you get a nice dose of the aroma but while toasting, the aroma is distinct but not over-powering. But the flavor.... oh so good. Nutty, cheesy, fine grained and dense... very delicious.


Sadly, Grandma passed away- at the fabulous age of 98- and the future of my salt-rising bread consumption looked bleak. Until Rising Creek Bakery & Cafe opened their cute little doors. This is the place that turned me on to Carrot Soup. Truthfully, I've never had anything from this bakery that wasn't divine (oh the Turkey & Cranberry Sandwich!). If you're ever driving down I-79 South from Pittsburgh, just about to enter West Virginia, it's worth getting off at Mt Morris to grab a bite to eat. Anyway, now they are my Salt-Rising bread source. Last fall, Big 'Un and I snuck down to the bakery for breakfast one morning while Zippy was at a sleep-over. Tomato gravy over salt-rising bread was on the menu that morning and since I had never heard of tomato gravy, much less eaten it, and it came over salt-rising bread that was, naturally, what I had for breakfast.


Bread at Rising Creek, waiting for me. Image via Post-Gazette.


Salt-rising bread was apparently first made by settlers in the Appalachian Mountains in the early 1800's. It is actually mentioned in the Laura Ingalls Wilder book The Little House in the Big Woods. I've seen a couple places trying to pass it off as an Amish bread and while I'm sure the Amish made/make this bread I wouldn't bet they invented it, mainly because it is fairly wide-spread through-out Appalachia. Today, salt-rising bread is called an artisan bread, but it was originally just bread- what you made with what you had in order to feed your family. Salt is not the ingredient that causes this yeast-free bread to rise but rather a fermentation process that uses naturally occurring bacteria. I heard it said that if you can't get this bread to rise, maybe your kitchen is too clean! Commercial yeast was not available until around 1860 or so. Don't worry, no one has ever been harmed by the bacteria in this bread, unless it is what has caused you to eat waaaaaay too much of it. Then you're just full, not harmed. Also, the salt content of this bread is the same as any bread. It is thought that warmed rock salt was used to keep the starter warm (hence the name) because it is very important to keep the temperature at the right spot for the dough to rise. I am not an expert on salt-rising bread, at least not in making it. I'm pretty close to a professional, however, when it comes to eating it. Click over to the SRB section of Rising Creek Bakery for information about the history of this neat bread as well as info on how to make it and how to order bread. Yes, the ladies at Rising Creek will mail bread to you, no matter where you live. You owe it to yourself to try it. This bread is best eaten toasted.


So, now, for the gravy. Delicious! Of course I went straight to my computer to search for Tomato Gravy recipes. The recipe below is one that I've cobbled together from the many that I've tried, though I think it's mostly a basic recipe. As with anything, there are variations galore, some fancy, some weird, but this is the way I generally make tomato gravy.


Ingredients:
2-3 cloves of garlic (to your preferences but I  like 2 cloves)
1 medium-size onion, finely chopped
2 tablespoons olive oil
4 large tomatoes, chopped (medium coarse, not too small)
1/2 cup whipping cream
1/2 teaspoon salt
1/2 teaspoon ground red pepper
1/2 teaspoon thyme

Making:

Saute the garlic and onions in the olive oil in a medium skillet for about 5 minutes. Stir in the tomatoes and simmer on low for about 20 minutes. Stir every one in awhile.

Stir in the whipping cream, salt, red pepper, and thyme. Simmer another 5 minutes or so, until it thickens.


Eating:
Cut a nice thick-ish slice of salt-rising bread and toast to a nice golden color. Oh that aroma- you'll come to love it. True confession time- I usually have two nice thick-ish slices. Lay your toast on a plate and spoon over a generous helping of tomato gravy. Arm yourself with a second fork to stab at people who are trying to steal your breakfast right off your plate. The gravy keeps well in the 'frig.


This came out smoother than normal. I generally like to chop the tomatoes
fairly coarsely so there are big pieces of tomato in the gravy.


I can't wait for the tomatoes to start coming out of the garden this summer so I can make this with garden-fresh, not store-fresh, tomatoes. Oh.......


Thanks for stopping by today. Have a great one and I'll see you next time.


Today's butterfly pic ...


Wednesday, April 4, 2012

Marathon Remodel and a Do-Over


Yikes! I had forgotten how "special" this bathroom was when we moved into our old farmhouse. We rarely used it for almost two years because the entire third floor was empty, a no-man's land. Well, actually, the third floor was "tied up in other projects."


The grooviest (and funkiest) kitchen a girl could ever hope to have.


Our first priority after we bought our 200 year old farmhouse was to work on the kitchen. What you don't see here is the "pantry" to the right with a plastic pull up window blind for its door and a free-standing heater that was vented directly out through the wall above a sliding glas door. Vented, I might add, with drier vent. Nor do you see the avocado green refrigerator to the left and the matching stove we had already taken out that was- not kidding- 18 inches wide. This room too is a story all its own but in the process of trying to get the kitchen done, we ended up with the third floor all ripped up in order to run water and heating to the kitchen. My huband's viewpoint was that since we had to run copper pipes to the kitchen we may as well do it all at once. Since the pressure tank for the well system was, for some reason, on the third floor we ended up moving that as well so we worked on the third floor and the first floor at the same time.


The third floor bedroom, our Master Suite in the making.


And sure enough, when we lifted floor boards on the third floor to run pipe, we found water damage from leaky windows. We traced it back to the source and fixed it, at additional time and expense. Of course. It was a pattern that quickly established itself in our home: start one project and you never know what else you'll discover and have to fix. It's the reason we haven't replaced the siding on our house. We know that there are already two layers of siding on the entire house and the back side, the weather side, has three layers. Besides the fact that the last layer on the outside is that old asbestos cement board that has to be removed with abatement procedures (just say "money pit"), we're afraid of what we might discover if we start ripping off siding.


Anyway...


We finally made it to working on the third floor bath. People occasionally ask us if we ever found the treasure of the old man who lived here and sadly we have not. However, at the end of the closet was a hole through the plaster to the area under the rafters where we found a blue fur coat with orange satin lining and a newspaper. I would have worn the very cool coat had the mice not found it first and the newspaper was from the day before Kennedy was shot. We would have also kept the newspaper but time had found it as well and it crumbled away as we looked through it though we were being as careful as possible.


First priority in the bath was a shower-tub. The closet was very narrow, too narrow in fact to put shelves up and still be able to squeeze in, so we opened the wall between it and the bath and used that space for a shower-tub. Did I mention that by this time I was pregnant with our Zippy? I helped carry that tub surround up three flights of stairs when I was five months along. Maybe not wise but I think that Big 'Un actually carried most of it by himself.


Anyway... again....


How did it turn out? First edition looked like this ...


The scheme was all based on the shower curtain I had ordered from Coldwater Creek. I really liked the way it came out and like it all over again when I see these pictures. But, after 16years here, I got started "re-working" some of the colors in the house. The new bedroom (still in progress, of course) began clashing with the bathroom so off to the paint store I went. That's mostly all I did the second time around was paint because I didn't want to get into spending tons of money and I loved the shower curtain. Painted the walls and wainscot, painted the vanity. I was going to paint the wooden towels bars as well but then I started thinking that maybe the paint would eventually begin to peel from the damp towels so we replaced those also. Oh, and I "antiqued" the gold mirror frame. But for the cost of a couple gallons of paint and some hardware, I think I came out OK the second time.


I hope you can see the blue walls- clear and pastel, no gray in it at all.


Remember how I didn't want to get rid of the previous shower curtain because I loved it so much? Well, after all was done and over with, I found this sweet embroidered curtain at TJMaxx. Some things were just meant to be.


I replaced the green leaf dish on the vanity with this little bowl I made at a local pottery shop.
The paint job is sort of wobbly but the tip on the paint bottle and I weren't getting along that day. Oh well, it is well.


Maybe you noticed we have an atrium door to the bathroom. I love atrium doors and two of the baths in our house have them. I covered the glass with a frosted privacy film so that we still get light but not sight. There is an odd triangular "vestibule" outside of our master bath and it can be sort of dark. Not really because we have huge windows just around that corner but that's how I marketed it to Big 'Un when we were door shopping. Anyway... 


I drew blossoms to match (sort of ) the blossoms on the shower curtain on the glass side of the upper right quadrant of the door and cut the frosted film off of the other side of the door with an exacto knife. This was actually kind of tricky and not at all like cutting paper. The end result looks somewhat like woodcut prints but I'm OK with that look. It's a very subtle effect and that's fine as well. Perhaps I could cut out blossoms from some of the leftover film and apply it on top of the film that is already applied to the glass for more of a dimensional look. Hmmm.....


Even though our house is close to the road, we are fortunate to live out in the country so we can get away with no curtains on the window. One of my small pleasures is observing the reflection of the big maple out front in the mirror. I like how those big old branches change from one season to the next.


So there it is-- the final remodel for our Master Bath.


Maybe...


(Hey- I'm thrilled you visited me today. Stop by again in a couple of days and we'll get busy with some great old home cookin')


Today's butterfly pic- from my personal collection.